REVIEW · MILKY WAY TOURS
Milky Way Photography Workshop in Acadia National Park
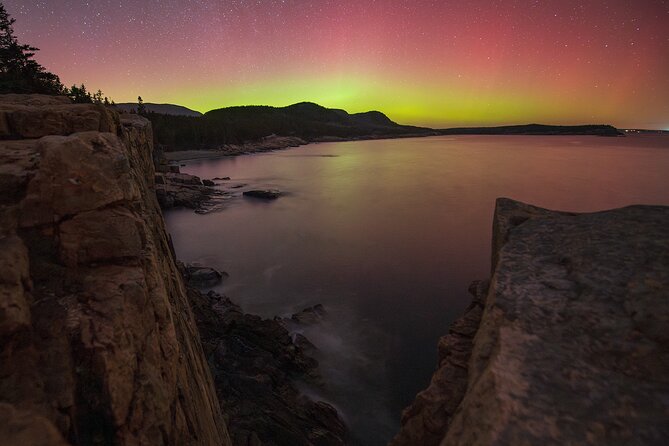
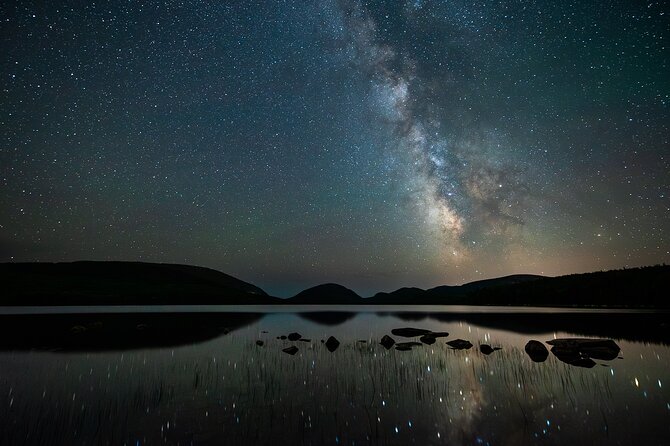
Acadia’s granite coast and dark northern skies give this workshop a clear purpose: you learn to make the stars part of the story, not just a bright background. Over about five days, Christopher guides you to Jordan Pond, Otter Cliff, Sand Beach, Bubble Pond, and Eagle Lake for night photography with dramatic foregrounds.
I like the small maximum group of five, which gives you a fair chance to ask questions while working in the field. I also like the mix of shooting and editing, especially the instruction on blending a Milky Way exposure with a longer foreground exposure in Photoshop.
The main drawback is the price: $2,500 per person, before meals, lodging, and the park fee. This is a serious workshop rather than a casual night outing, so you’ll get the best value if you already own suitable gear and want skills you can keep using.
Key points before you book
- Christopher teaches the full process: You work on planning, camera setup, field technique, and editing rather than only taking a few souvenir photos.
- Five Acadia locations are included: Jordan Pond, Otter Cliff, Bubble Pond, Sand Beach, and Eagle Lake each offer a different way to frame the stars.
- The group is capped at five people: Private transportation within the park keeps the schedule focused and avoids driving between dark locations yourself.
- You need specific equipment: Bring a DSLR or mirrorless camera, a wide-angle lens at f/2.8 or faster, a sturdy tripod, and an intervalometer unless your camera has one built in.
- Editing help continues after the fieldwork: A one-on-one post-processing session via Discord is included.
- Night hours shape the experience: The listed operating window is 7:00 p.m. to 11:30 p.m. and 12:00 a.m. to 3:30 a.m., Tuesday through Saturday, from April 26, 2024 through June 20, 2026.
What the $2,500 workshop is really selling
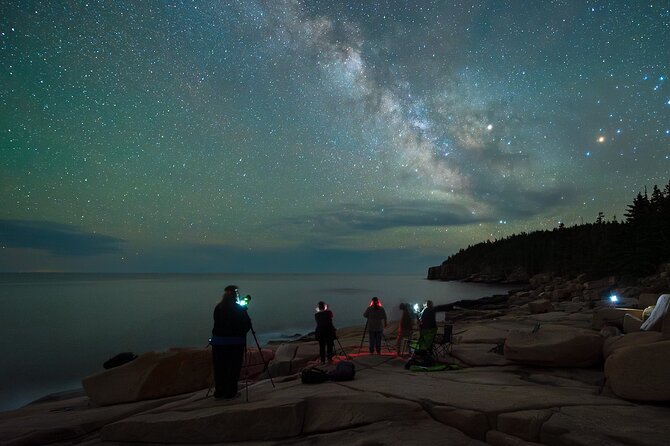
You are not paying only for access to Acadia after dark. The cost covers private transport inside the national park, instruction from Christopher, water and snacks in the vehicle, and a personal editing session after the workshop.
That matters because night-sky photography has several moving parts. You need to find a dark enough location, predict the Milky Way’s position, focus accurately, keep the tripod steady, choose an exposure, and often make a separate image for the foreground. A good sky alone does not guarantee a good photograph.
The workshop teaches both single-exposure and stacked images. A single exposure is simpler and can work well when you want a fast, clean field workflow. Stacking several images can help manage noise, but it adds more work later. Learning when to use each method is more useful than memorizing one camera setting.
The price makes sense for a photographer who wants direct coaching and a finished workflow. It is harder to justify if you only want one scenic night, do not plan to edit your files, or still need to buy the required equipment.
Meals and lodging are not included. You should also budget for the listed $20 entrance fee. The description calls this a valid Yellowstone National Park pass, which does not match an Acadia workshop, so confirm the correct pass or fee with Wildscape Adventure before booking.
More National Park Stargazing in the USA
- Stargazing in Zion National Park’s International Dark Sky
★ 5.0 · 73 reviews - Astro-Photo, Hiking and Stargazing Tour in Arches National Park
★ 5.0 · 63 reviews - Private Stargazing – Sequoia National Park
★ 4.5 · 14 reviews
Planning the Milky Way with PhotoPills
A strong night photograph begins before you arrive at the viewpoint. Christopher teaches you to use PhotoPills to plan the Milky Way’s position and line it up with Acadia’s shore, cliffs, ponds, or other foreground elements.
This is one of the most useful parts of the course. Instead of arriving, pointing your camera at the sky, and hoping for a good arrangement, you can think about direction, timing, and composition ahead of time. The goal is not simply to record stars. It is to place celestial movement in relation to a real place.
The app work also gives you a repeatable skill. You can use the same planning method later for other coastlines, mountains, or rural locations. For a photographer who wants to work independently after the workshop, that planning lesson may be worth as much as a single successful image.
You should still expect conditions to change. Clouds, visibility, and the position of the Milky Way can affect the final result. The experience requires good weather, and if poor weather cancels it, you are offered another date or a full refund.
Jordan Pond: calm water and careful framing
Jordan Pond is the first listed stop and gives you a quieter setting than the open coast. The pond can provide a reflective foreground, while the surrounding hills and trees help give the sky a sense of scale.
This location is useful for learning how to balance dark land with a bright sky. If you expose only for the stars, the foreground may become too dark. If you expose too long for the ground, the stars may lose their impact. That is where separate exposures and later blending become important.
The pond also encourages patience. Reflections, tree shapes, and the position of the Milky Way all need to work together. You might find this a less dramatic setting than Otter Cliff, but it can produce a more controlled composition.
Otter Cliff: bold rock beside the stars
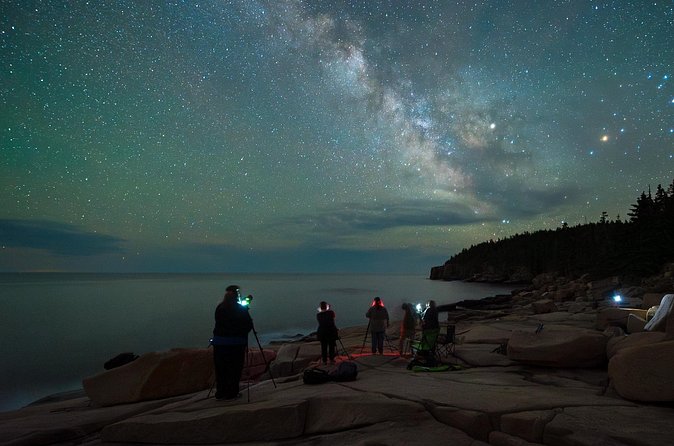
Otter Cliff brings the rugged coast into the picture. Its rock forms can give your image a strong anchor, while the open sky supplies the scale and movement.
This is the kind of place where foreground technique matters. You may make one exposure for the night sky and a longer one for the cliff, then combine them in Photoshop. That approach can preserve detail in both areas, though it requires careful editing and accurate alignment.
The coast also brings practical limits. You will need to work with a sturdy tripod and pay attention to your footing. The information provided calls for moderate physical fitness, so this is not presented as a completely effortless roadside activity.
More Astrophotography Tours in the USA:
- Moab: The Windows Astro-Photography and Stargazing Hike
★ 4.8 · 36 reviews - Stargazing and Milky Way Portrait in Capitol Reef National Park
★ 4.5 · 13 reviews - Night Sky Private Photo Tour
★ 5.0 · 8 reviews - Milky Way Photography in Arches National Park
★ 4.0 · 4 reviews
Bubble Pond: another way to read the night
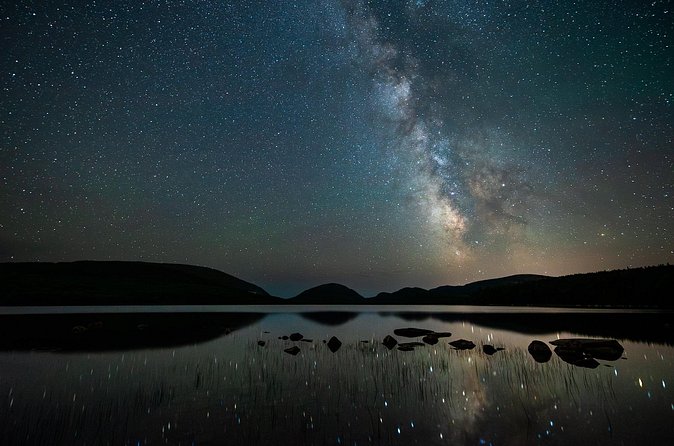
Bubble Pond adds a different setting to the workshop’s series of locations. Like Jordan Pond, it gives you water and surrounding forms to use as part of the composition, but the change of place helps you see how a similar sky can tell a different visual story.
This stop is valuable for practice. You can compare the way still water, trees, and open sky affect the image. Rather than treating every stop as a hunt for the same Milky Way shot, you are encouraged to think about how the foreground changes the mood.
The workshop also covers focus stacking. That technique can help you keep both nearby foreground details and distant stars sharp, though the final process takes more than a single press of the shutter. If you have never tried focus stacking, this is an area where Christopher’s field guidance and later editing help can save you a lot of trial and error.
Sand Beach: open sky and coastal scale
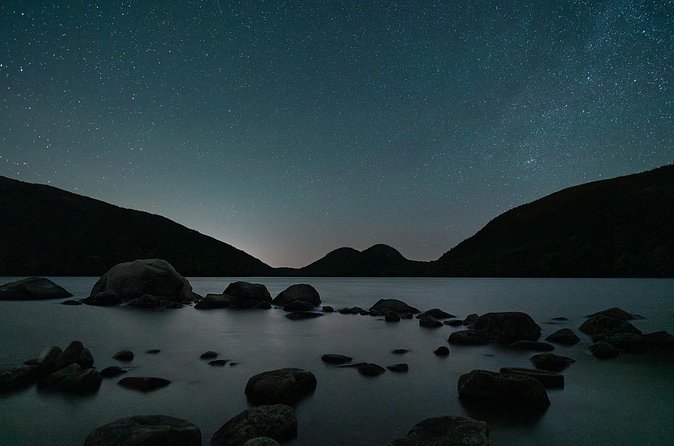
Sand Beach offers a more open coastal composition. The shore can provide a clean foreground, while the surrounding rock and ocean give the photograph a stronger feeling of space.
It is a useful place to work on storytelling. A night-sky image can show more than stars. The curve of the beach, the edge of the water, and the shape of the coast can tell you where you are. That sense of place is central to this workshop.
The openness may also make composition more demanding. You have fewer trees or pond edges to use as natural frames, so the camera position and horizon become especially important. Christopher’s role here is not simply to point out a scenic view, but to help you decide what belongs in the frame.
Eagle Lake: a final change of scenery
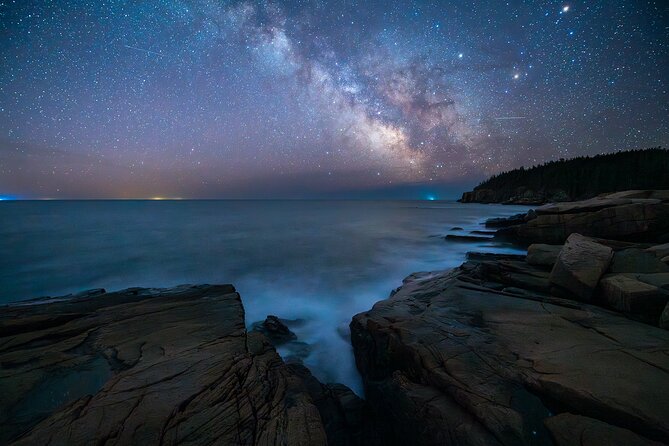
Eagle Lake rounds out the listed itinerary with another water-based setting. It gives you a chance to apply the same basic tools in a new arrangement of water, land, and sky.
By this point, you should have worked through several kinds of foreground: rock, beach, trees, and pond or lake edges. That variety helps you understand that astrophotography is also ordinary composition under difficult light. The Milky Way may draw attention, but the image still needs shape, balance, and a clear subject.
The exact order and timing of the stops can depend on the night schedule and conditions. You should treat the itinerary as a set of planned locations, not a promise that every stop will produce identical skies or equal shooting time.
From manual settings to stacked images
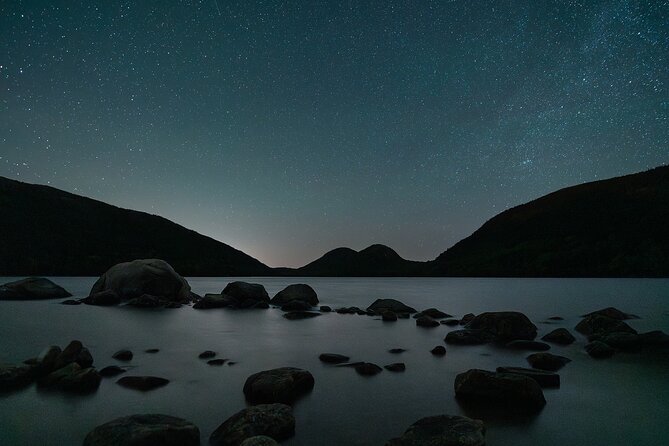
You need a basic understanding of manual camera settings before arriving. This is not presented as a beginner course in photography from the ground up. You should already be comfortable changing aperture, shutter speed, ISO, and focus.
The required equipment is specific:
- A DSLR or mirrorless camera that can make long exposures
- A wide-angle lens with an aperture of f/2.8 or faster
- A sturdy tripod
- An external intervalometer, unless your camera includes one
- A basic working knowledge of post-processing
The fast wide-angle lens matters because night photography gives you limited light. The tripod matters because even a small movement can soften the stars and foreground. The intervalometer matters when you make a sequence for stacking or time-lapse work.
Christopher also teaches time-lapse photography. That may appeal to you if you want to turn changing clouds or moving stars into a short video rather than a single still image. Past participants have also learned Milky Way panoramas and multiple-exposure methods, along with software workflows for turning sequences into time-lapse videos.
These added topics are useful, but they also point to the workshop’s level. You should expect a broad set of techniques, not a relaxed sightseeing program with a little camera advice on the side.
The editing session may be the best value
Many photography outings end when you pack away the tripod. This one includes a one-on-one post-processing session through Discord, which gives you time to work through the difficult part: turning field files into finished images.
The editing instruction covers Lightroom and Photoshop. You can learn how to process the sky, manage noise, blend a Milky Way exposure with a longer foreground exposure, and use focus-stacking methods. The aim is to make a photograph that looks intentional rather than simply brightened.
That distinction matters. Night files often need careful white balance, contrast control, masking, and noise reduction. A dramatic edit can quickly look artificial if the sky and foreground do not match. Individual help is particularly useful here because your own files, not generic sample images, reveal where the problems are.
The post-workshop session also gives you a place to ask questions after you have had time to inspect your files. That continued contact is a strong feature for anyone who wants to keep practicing after returning home.
Small group, private transport, and late hours
The group maximum is five people. That is small enough for hands-on help with tripod height, focus, framing, and exposure. It also means your experience will be shaped by the needs of a few photographers, rather than by a large sightseeing group.
Private transportation covers travel within Acadia during the workshop. This is helpful after dark, when you would otherwise need to navigate between locations, watch the clock, and manage unfamiliar roads while carrying delicate equipment.
The listed hours are unusual but sensible for night photography. Sessions are offered Tuesday through Saturday from 7:00 p.m. to 11:30 p.m. and from midnight to 3:30 a.m. The late schedule may let you work during darker hours, but you should plan your lodging and rest around it.
Pickup is offered, and the ticket is mobile. Service animals are allowed. The activity calls for moderate physical fitness, and meals and lodging remain your responsibility.
Who will get the most from it
I would recommend this workshop to you if you already understand manual exposure and want to move beyond basic star photographs. It is especially suited to photographers who want stronger foregrounds, planned Milky Way compositions, stacking, panoramas, time-lapse work, or better Lightroom and Photoshop habits.
It also suits someone who values instruction more than a packed sightseeing schedule. Christopher is described as calm, patient, warm, and fun to work with, with teaching that runs from pre-shoot lessons through field practice and editing. Those qualities matter when you are working in darkness and trying to solve several technical problems at once.
I would hesitate if you are looking for a family activity, a quick introduction, or a simple ride through Acadia. The late hours, equipment requirements, physical demands, and high price make this a specialist experience.
The five-day format also means you should be ready to give the workshop real space in your trip. You will need separate plans for food and lodging, and you should not count on weather producing perfect skies every night.
Should you book the Acadia night-sky workshop?
Book it if you want a serious, small-group photography course and can use the required gear already. The strongest reasons are Christopher’s full teaching process, the five carefully chosen Acadia locations, and the personal editing session that helps you finish what you shoot.
Skip it if you mainly want to see the stars or take a few casual photos. You would be paying for instruction and post-processing support you may not use.
For the right photographer, the value is in the lasting skills: planning with PhotoPills, making separate sky and foreground exposures, trying focus stacking, building time-lapse sequences, and editing with purpose. Confirm the entrance-fee detail with Wildscape Adventure, then book only if the price, late hours, and equipment list fit your goals.
FAQ
Where does the workshop take place?
The workshop is based in Bar Harbor and takes place within Acadia National Park.
How long does the workshop last?
The experience lasts approximately five days.
What locations are included?
The listed locations are Jordan Pond, Otter Cliff, Bubble Pond, Sand Beach, and Eagle Lake in Acadia National Park.
What camera do I need?
You need a DSLR or mirrorless camera capable of making long exposures.
What lens should I bring?
You need a wide-angle lens with an aperture of f/2.8 or faster.
Do I need a tripod?
Yes. A sturdy tripod is required.
Is an intervalometer required?
You need an external intervalometer unless your camera has one built in.
Are meals and lodging included?
No. Meals and lodging are not included.
Is transportation included?
Yes. Private transportation is included for travel within Acadia National Park during the workshop.
What happens if the weather is poor?
If poor weather causes cancellation, you are offered a different date or a full refund. Cancellation by you is free up to 24 hours before the experience start time.
More Milky Way Tours in the USA
- The Night Sky Star Story, Galaxy, and Sedona Story Tour
★ 4.5 · 243 reviews - Mount Bromo Milky Way Photography and Sunrise Private Tour (1D1N)
★ 5.0 · 6 reviews - Milky Way Sanctuary Stargazing Tour at Pangue Observatory
★ 4.2 · 5 reviews
Fresh listings near the USA
- Stargazing and Milky Way Portrait in Capitol Reef National Park★ 4.5 · 13 reviews
- Temecula Wine Country Stargazing Tour★ 5.0 · 2 reviews
- Astronomy and Stargazing Tour in Utah★ 5.0 · 8 reviews
- Sunset Sedona Sacred Places -gourmet picnic dinner and stargazing★ 5.0 · 12 reviews
- Sedona UFO/Stargazing Tour (price per goggle not per person)★ 4.5 · 47 reviews
- Sedona Night Hike and Stargazing★ 5.0 · 7 reviews
- Stargazing Tour with Telescopes and Video Astronomy in Sedona★ 5.0 · 40 reviews
- PRIVATE Sedona Jeep Tour 4X4 Stargazing Tour at Night★ 4.5 · 11 reviews
Milky Way Tours, side by side.
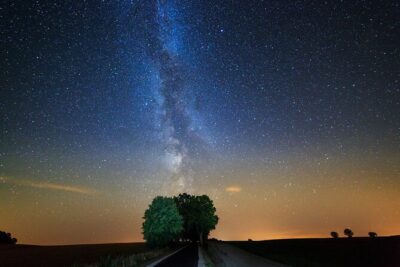
The Night Sky Star Story, Galaxy, and Sedona Story Tour
Read our review →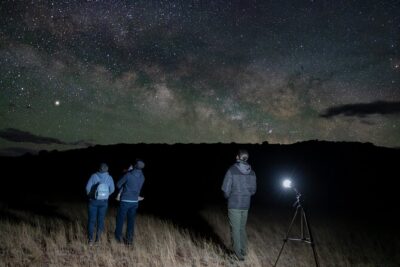
Stargazing and Milky Way Portrait in Capitol Reef National Park
Read our review →
Mount Bromo Milky Way Photography and Sunrise Private Tour (1D1N)
Read our review →
Milky Way Sanctuary Stargazing Tour at Pangue Observatory
Read our review →