REVIEW · ASTROPHOTOGRAPHY TOURS
Milky Way Photography in Arches National Park
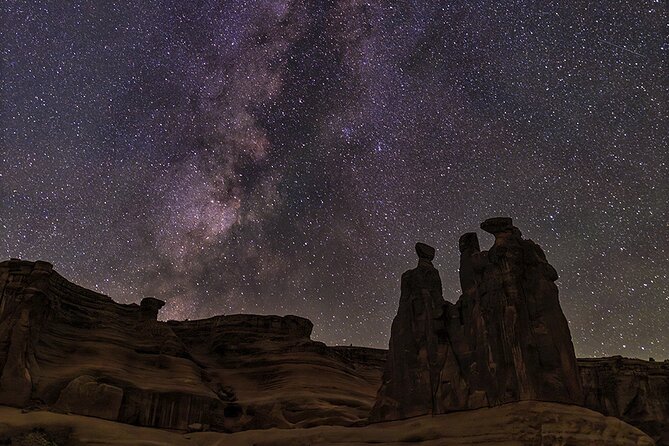
Arches National Park after dark gives you a view most daytime visitors never see: a black sky crowded with stars, framed by famous red-rock formations. This small-group night tour takes you to at least two locations and gives you hands-on help with the camera settings needed for Milky Way photography.
I like the focused instruction and the chance to improve your composition with Colin Young or Jeremy, rather than simply being driven to a viewpoint. I also like the practical touches, including snacks, refillable ice water, and a possible loaner tripod. The main drawback is timing: from March through May, the Milky Way appears after midnight, and the tour becomes a very late-night outing.
Key points to know before booking
- At least two Arches locations: You will photograph the Milky Way from more than one setting inside the park.
- Small maximum group: The tour accepts no more than four people, which leaves room for camera help and questions.
- Bring serious camera gear: A DSLR or mirrorless camera, wide lens, sturdy tripod, and headlamp are strongly recommended.
- Seasonal scheduling matters: Spring dates begin late at night, while fall bookings are offered only as a sunset and night combination.
- Instruction is part of the value: You receive a crash course in settings, focusing, exposure, and composition.
- Cell phones are not ruled out: Late-model iPhones and other advanced phone cameras may capture the Milky Way.
Why Arches after dark is worth your time
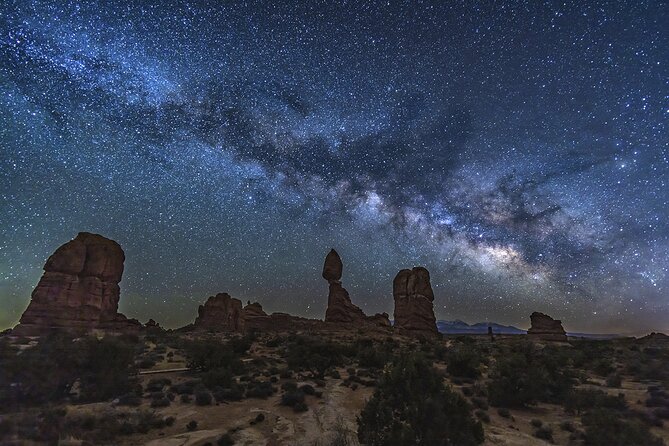
Arches is an internationally recognized dark sky park, and that matters more than the label suggests. Far from the glow of a large city, the sky can reveal a broad band of stars and the Milky Way with much greater clarity. The red-rock arches and towers give you something to place beneath that sky, turning a row of stars into a photograph with shape and scale.
This is not simply a scenic drive at night. You are learning how to make a long-exposure image in conditions that can be difficult to read with your eyes. A camera set to the wrong ISO, aperture, focus, or shutter speed can produce a black frame, a blurry frame, or a sky with little detail.
The guide begins with a crash course in the basic settings. That preparation is useful even if you have taken photos for years, because night photography asks you to work in a different way. You will likely need to rely on manual controls, a high ISO, a wide aperture, and a stable tripod rather than the automatic modes that work well in daylight.
Colin Young also sends an instruction sheet before the outing, giving you a chance to set up your camera in advance. That is a small but valuable detail. It means you can spend more of the limited night session taking pictures instead of trying to find the ISO menu in the dark.
More National Park Stargazing in the USA
- Stargazing in Zion National Park’s International Dark Sky
★ 5.0 · 73 reviews - Astro-Photo, Hiking and Stargazing Tour in Arches National Park
★ 5.0 · 63 reviews - Private Stargazing – Sequoia National Park
★ 4.5 · 14 reviews
Meeting in Moab and heading into the park
The stated meeting point is the Moab Information Center at 25 East Center Street. Pickup is offered, and the activity returns to the meeting point at the end. The total outing lasts about three and a half hours, so allow extra time around the scheduled start if you are arranging dinner, lodging, or another evening activity.
The group size is limited to four people. I consider that one of the strongest features of the outing. Night photography often requires individual adjustments, and a crowded group can turn a lesson into a quick demonstration followed by a wait. With only a few people, you have a better chance to ask about your own camera, lens, or framing.
The exact viewpoints are not listed in advance, but the plan includes at least two locations inside Arches National Park. That variety matters. One spot may offer a clean view of the Milky Way, while another may give you a stronger foreground with an arch or other rock formation.
Do not expect a fast succession of major sights. The point is to stop, set up, compose, expose, and make adjustments. A single photograph can take several minutes once you include tripod placement, focusing, test shots, and changes to the camera settings.
The first lesson: setting up for the Milky Way
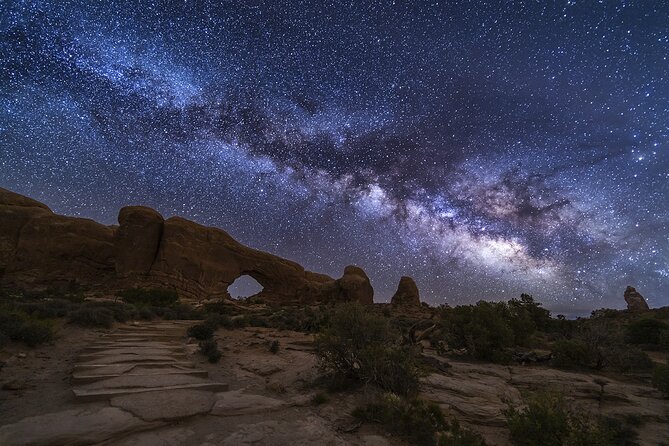
Before serious shooting begins, you receive instruction on how to capture the Milky Way with a DSLR or mirrorless camera. The tour is best suited to a camera that can shoot at least ISO 3200. A camera with manual exposure controls is also important, since you need direct control over the settings.
The recommended lens is wide and fairly bright:
- Full-frame cameras: roughly 14mm to 35mm
- Crop-sensor cameras: roughly 10mm to 24mm
- Maximum aperture: f/3.5 or lower
A wide lens allows you to include more of the sky while keeping a prominent rock formation in the frame. A lower f-number lets in more light, which is especially helpful when the scene is nearly dark.
You will also need a sturdy tripod. A small or flexible tripod may not hold a larger camera steady during a long exposure. Bring a headlamp or flashlight as well, preferably one with a red-light setting. Red light is less disruptive to your own night vision and less distracting to people working nearby.
A useful habit is to organize your equipment before leaving your hotel. Charge the camera battery, clear space on the memory card, pack the tripod plate, and make sure you know how to switch off automatic focusing. These simple checks can save a surprising amount of time once you are standing beside a dark trail or overlook.
Photographing at the first Arches location
At the first location, the guide helps you put the basic settings into practice. You will set up the tripod, choose a composition, focus in the dark, and make a test exposure. The guide can then help you decide what needs changing.
Focus is often the tricky part for beginners. In daylight, autofocus quickly finds a subject. At night, it may hunt or fail entirely. You may need to focus manually, using a bright star or distant light as a reference. The guide’s help is especially useful here because the camera screen can make a slightly soft image look acceptable until you view it later.
Composition is another major benefit. It is easy to point the camera straight upward and record stars, but a stronger photograph usually includes a clear foreground. The arches and red rock provide that structure. Colin has also helped visitors think about framing, so you can work on balancing the sky with the park’s distinctive stone forms.
The process is calm and methodical. You take a test image, inspect it, adjust the settings, and try again. This is not the place for a rapid-fire approach. The dark setting forces you to slow down, which can make the lesson more useful than a quick stop at a viewpoint.
More Astrophotography Tours in the USA:
- Moab: The Windows Astro-Photography and Stargazing Hike
★ 4.8 · 36 reviews - Private astronomy tour with sunset toast, picnic, and astrophotography
★ 4.8 · 83 reviews - AuthenticAs Star Gazing -Nightscape Portrait Photography Tour
★ 5.0 · 59 reviews - Doha Night Desert Safari, Stargazing, Photography، Relaxation
★ 5.0 · 28 reviews
A second location adds variety
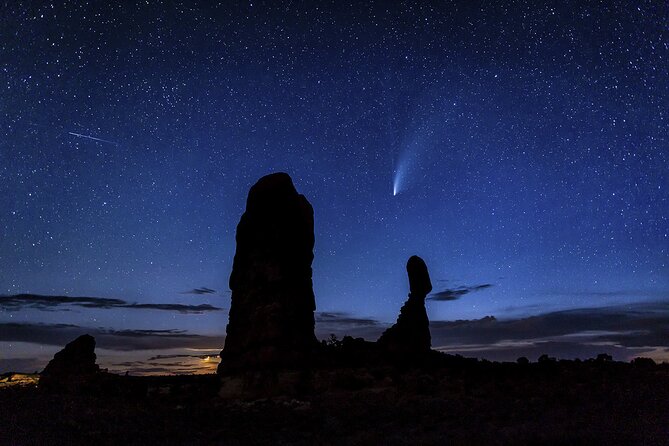
The tour visits at least one more location in Arches National Park. That second stop gives you a chance to apply what you learned without starting from zero. You may find that a different foreground, direction of view, or amount of visible rock changes the way you frame the sky.
This second setup is also where the instruction can become more personal. Once you understand the basic exposure, you can ask about composition, camera-specific controls, or how to make the stars and rock formations work together. Jeremy and Colin have both been praised for patient, approachable teaching and for helping with different cameras.
The park’s geology and history may also enter the conversation. At night, the formations can look unfamiliar, and understanding the shapes around you helps you choose a stronger frame. Still, this remains a photography outing first. If you want a full park history tour, choose a daytime experience designed for that purpose.
The physical demands are moderate. You should be comfortable walking and standing outside at night, carrying your camera, lens, and tripod. The activity is not recommended for people with poor night vision. Darkness can make ordinary footing harder to judge, so sensible shoes and a light you can control are important.
What non-photographers can expect
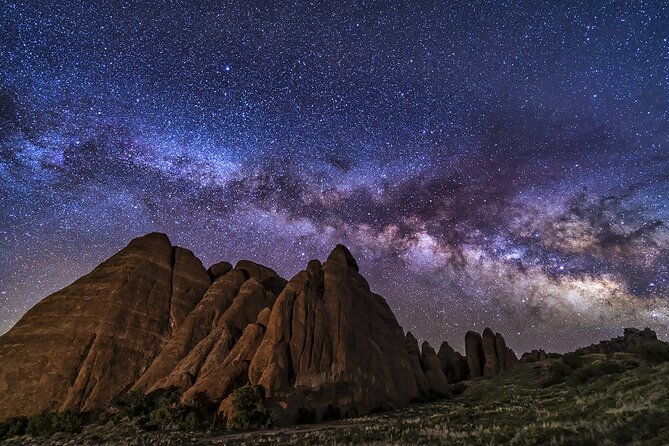
You do not have to own a camera to enjoy the night. People in the group who bring only a cell phone can still look at the stars and take part in the outing. Late-model iPhones and other advanced phone cameras may be able to record the Milky Way, though results will vary.
That distinction is important. If your main aim is to learn advanced night photography, bring the recommended gear. If you simply want to see the Milky Way from a dark-sky park, the experience can still be worthwhile without a DSLR.
The guide does not provide cameras. A spare tripod may be available to loan, but you should not count on that without confirming it in advance. Bring your own camera, lens, tripod, and light if you want the best chance of producing a finished image.
The seasonal schedule changes the whole experience
Timing is the detail most likely to affect your decision. From March through May, the Milky Way does not appear until after midnight. During those months, this is offered as a standalone late-night tour with pickup beginning very late.
That schedule may suit you if you are specifically planning around the Milky Way. It is less convenient if you have an early hike, a family activity, or a long drive the following morning. Plan your sleep and driving carefully, especially if you are staying outside Moab.
In fall, the operator offers only a sunset and night combination rather than this standalone night outing. That can make for a fuller evening, but it also means you need to check the seasonal format before booking. The sunset portion may appeal to you if you want to photograph the red rock in changing light before the stars come out.
Moon and weather conditions can also affect what you see, but no specific moon or weather guarantee is provided. The safest approach is to treat the tour as a chance to learn and photograph under dark skies, not as a promise of one exact image.
Is $275 per person a fair price?
At $275 per person, this is not a budget activity. The value depends on how much you want personal instruction and how much camera gear you already own.
For a group of up to four, the price buys more than transportation into the park. You receive a pre-trip setup guide, hands-on help with manual camera settings, composition advice, access to at least two locations, snacks, and bottled water. If you are new to astrophotography, avoiding hours of trial and error can make the cost easier to justify.
The price is harder to defend if you already shoot the Milky Way confidently and only want a ride to a dark viewpoint. In that case, the teaching may not add much. The tour makes the most sense for someone who wants both the setting and practical coaching.
Snacks include trail mix or snack bars, with gluten-free options. A cooler of ice water is available for refilling reusable bottles. These are modest inclusions, but they matter during a late-night outing when nearby services may be closed.
Group discounts are available, though the specific discount is not stated. Ask about the current terms before assuming it will apply to your party.
A note about scheduling and confirmation
Confirmation is sent within 48 hours of booking, subject to availability. Because the experience is run by a small, one-person operation, I would not wait until the last minute to reserve it, particularly if your Moab dates are fixed.
There has been at least one scheduling mix-up in which a booking was accepted even though the guide was unavailable. The operator offered alternate dates and another professional guide, but the episode shows why you should check your confirmation and messages soon after booking. If your itinerary is tightly arranged around the outing, verify the date before building other plans around it.
You can cancel up to 24 hours in advance for a full refund. That gives you some protection if the timing no longer works, though it does not remove the need to confirm availability.
Who will get the most from this outing?
I would choose this tour if you fit one or more of these descriptions:
- You own a DSLR or mirrorless camera but have never tried serious night photography.
- You want help with settings, focus, and composition rather than a simple star-viewing stop.
- You prefer a group of four or fewer.
- You are comfortable being outside late at night and walking at a moderate level.
- You want to photograph Arches with the Milky Way instead of seeing the park only in daylight.
- You are willing to bring a tripod, wide lens, and headlamp.
I would think twice if you have poor night vision, dislike late hours, or do not want to carry photography equipment. Cell phone users are welcome, but the activity’s main instruction is built around DSLR and mirrorless cameras.
Should you book Milky Way Photography in Arches National Park?
Book it if you want a guided introduction to photographing the Milky Way in one of the country’s best-known dark-sky settings. The small group, patient instruction, two-location format, and composition advice give the outing more substance than a basic stargazing drive.
Before booking, match the date to the season. Spring means a very late start, while fall uses a sunset and night format. Bring the right equipment, confirm the schedule promptly, and treat the $275 price as payment for personal coaching as much as for access to Arches after dark.
If you are serious about learning, this is a strong fit. If you only want to look at stars without using a camera, a simpler stargazing option may offer better value.
FAQ
Where does the tour begin and end?
The meeting point is the Moab Information Center at 25 East Center Street in Moab. The activity ends back at the meeting point.
How long does the experience last?
The tour lasts approximately 3 hours and 30 minutes.
How many people can join?
The maximum group size is four travelers.
What camera should I bring?
Bring a DSLR or mirrorless camera capable of shooting at least ISO 3200. A wide-angle lens is recommended, around 14mm to 35mm on a full-frame camera or 10mm to 24mm on a crop-sensor camera, with an aperture of f/3.5 or lower.
Do I need a tripod and headlamp?
You should bring a sturdy tripod and a headlamp or flashlight. A red-light setting is best. The guide may be able to loan a spare tripod, but cameras are not provided.
Is the tour available all year in the same format?
No. From March through May, the Milky Way appears after midnight, so the standalone tour begins with a late-night pickup. In fall, only a sunset and night combination is offered.
More Milky Way Tours in the USA
- The Night Sky Star Story, Galaxy, and Sedona Story Tour
★ 4.5 · 243 reviews
Fresh listings near the USA
- Boulder: Guided Astronomy Tour★ 4.7 · 11 reviews
- 1-Day Grand Canyon Tour from Las Vegas: Stargazing & Sunrise★ 3.6 · 3 reviews
- Professional Stargazing in Moab★ 3.5 · 3 reviews
- Private Stargazing – Sequoia National Park★ 4.5 · 14 reviews
- Private Tour of Griffith Observatory★ 4.5 · 58 reviews
- Haleakala Sunset and Stargazing Audio Tour★ 4.0 · 10 reviews
- Stargazing Tour in Kapalua★ 5.0 · 31 reviews
- S’mores and Stargazing on Hidden Beach★ 5.0 · 4 reviews
Astrophotography Tours, side by side.
AuthenticAs Star Gazing -Nightscape Portrait Photography Tour
Read our review →
The Windows Astro-Photography and Stargazing Hike
Read our review →
Doha Night Desert Safari, Stargazing, Photography، Relaxation
Read our review →